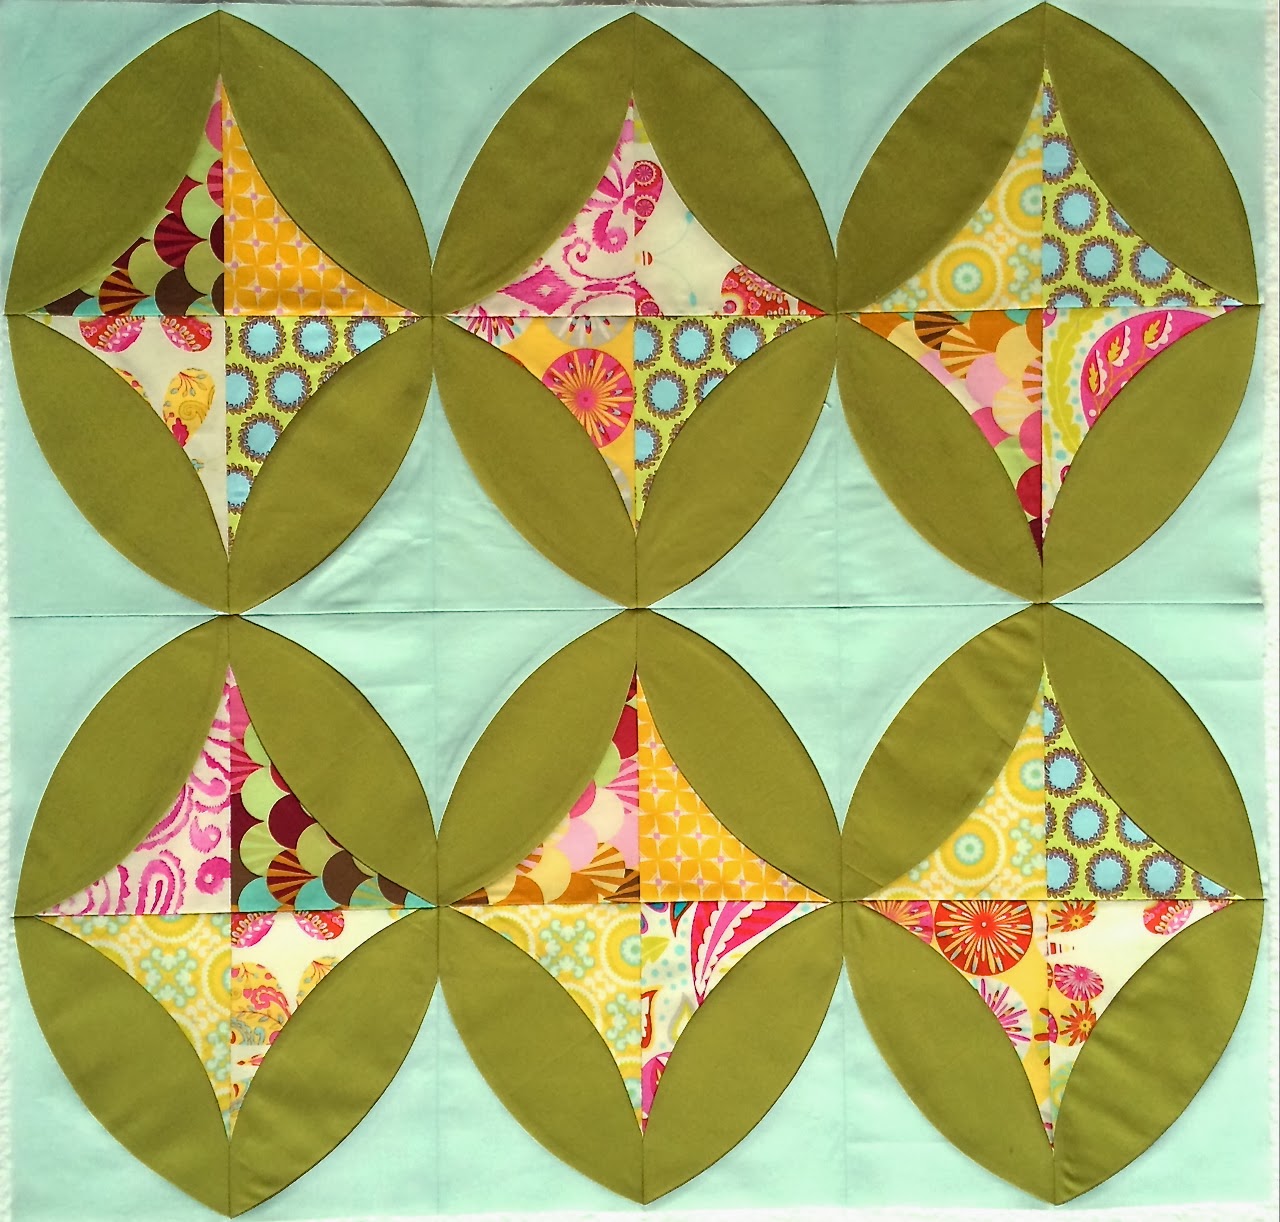
"Mod Olives" Tutorial
*Optional revision to tutorial can be found here.
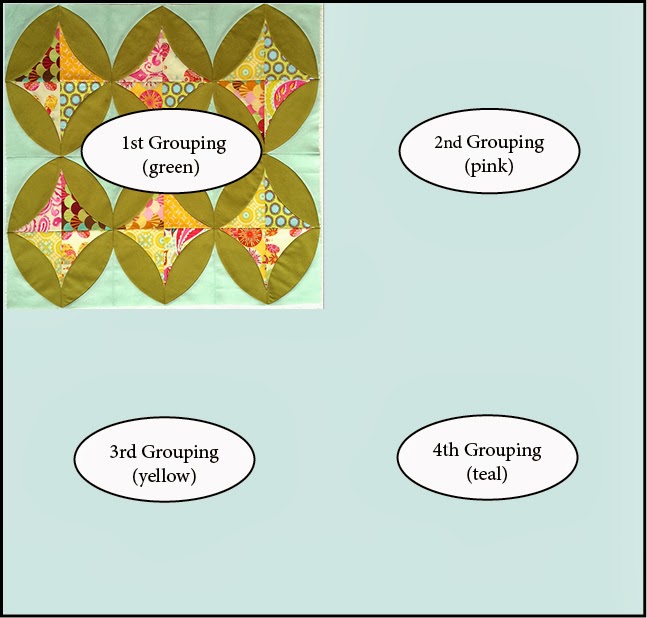
-(48) 6 x 8 rectangles prints (center diamonds)

From each solid oval fabric cut (2) 8 1/2" strips WOF. Lay strip out with fabric fold on left. Position QCR over left side of strip, making sure to align dotted reference lines to top and bottom edges and the "curve cut out" is close to left edge and still over fabric.Note: The ruler should be positioned with the hang hole on the left side for your first cut.
Rotate ruler, make sure to align dotted lines on top and bottom edges and the 3" vertical line is over corners of the cut you just made. (sample above in white circles) Cut in "curve cut out". Repeat these steps for 5 more oval sets, two per set. You will end up with 12 ovals per strip, 96 total.

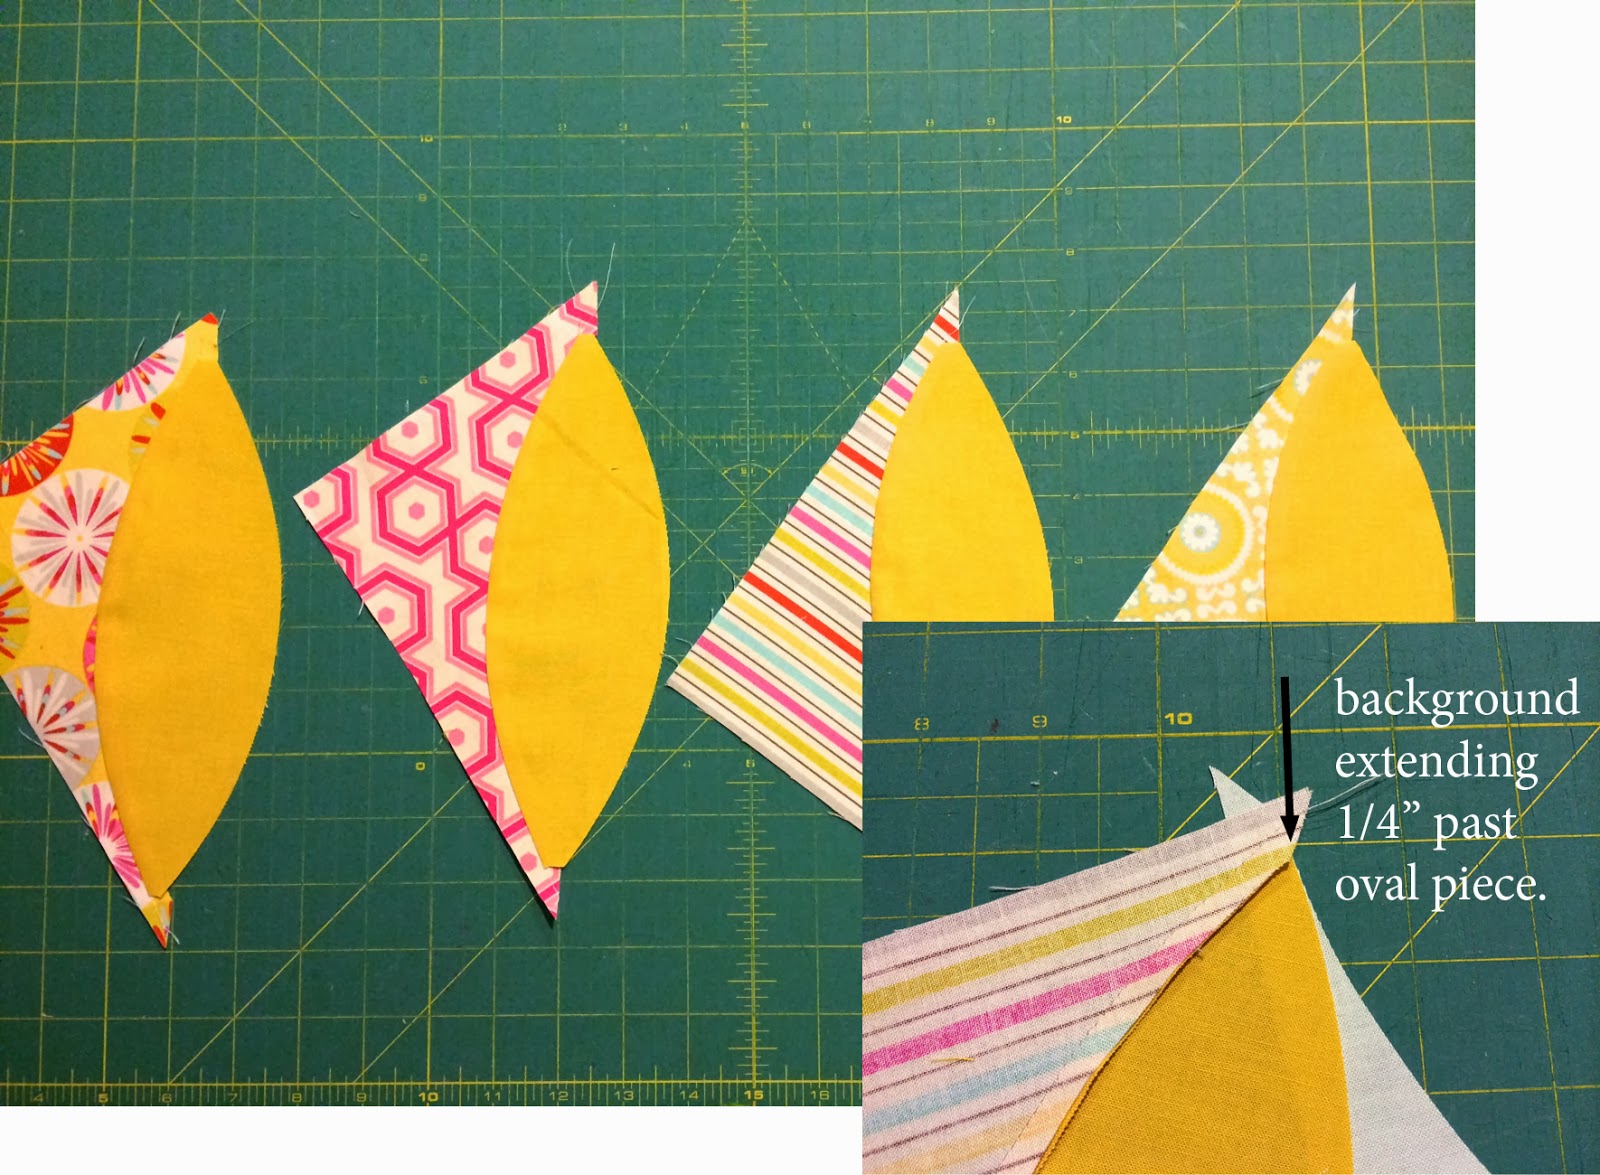
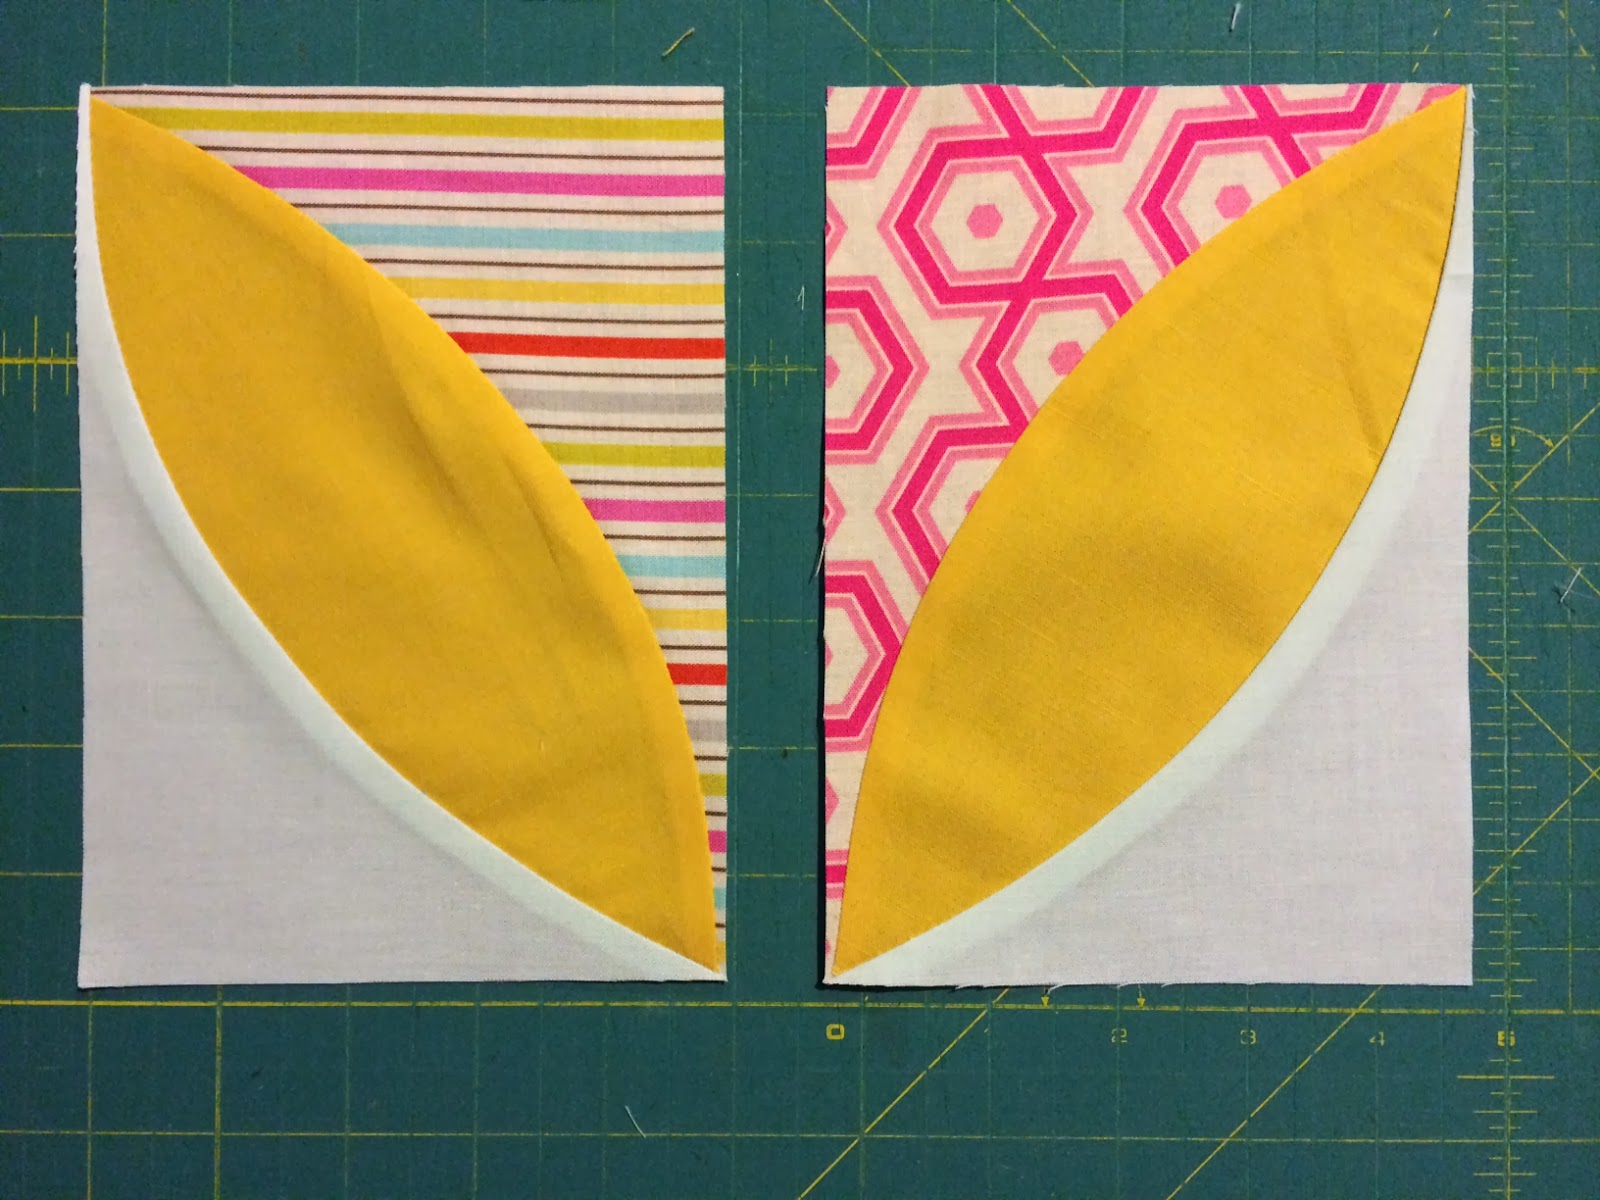
Stacking a few 6" x 8" print pieces, cut in half diagonally. Cut 24 in half one direction and the other 24 in half other direction as shown above. Note: Make sure your print fabric is all facing right side up.
From background fabric cut (48) 6" x 8" rectangles.
Cut 8" strips WOF then cross cut every 6".
Note: When you start cutting your 6" x 8" pieces start on the selvage edges. You will most likely get one more 6" x 8" piece on the fabric strip fold.
*Cutting instructions for background fabric are the same as the 6" x 8" print pieces. Make sure to cut 24 in half one direction and the other 24 in half other direction.

Stack a few triangles and place the QCR over stack so the long triangle edge sits at the 2 1/2" mark and the top and bottom points are at the 1" and 11" marks on Ruler as shown in white circles above. Repeat this for all triangles both print and background.


*Note: When pressing, don't hesitate to use steam to really flatten down your block!


Layout blocks as shown above. Sew to form rows sew rows to form a 13" x 9 1/2" block unit. Note: At this point, iron seams open to eliminate bulk.
Special note: I found it easier when sewing blocks together to start sewing on the side with no pieced seams as shown below.

